
Setting up an FTP server will allow you to receive and share files with virtually anyone, anywhere in the world. This tutorial will walk you through the basic steps of downloading, installing, and configuring Cerberus FTP Server. In addition to standard FTP and HTTP, Cerberus can also secure your connections with encrypted SFTP, FTPS, or HTTPS.
FTP and SSH SFTP are application protocols designed to allow individuals and businesses to easily transfer files between computers. The two protocols are commonly used to transfer data reliably and efficiently, whether it is uploading important files to your home backup system or securely sharing company files between two remote offices. HTTPS provides a modern, secure, and easy-to-use method of transferring files with a common web browser.
Part 1: Downloading and Installing Cerberus FTP Server
Close all other programs (recommended) before installing Cerberus FTP Server and make sure that you install it logged in as Administrator or a member of the Administrators group if you are installing it on a Windows NT or higher system.
- Download the Latest Cerberus FTP Server installer
-
Double click or run the CerberusInstall64.exe self-extracting installer. You may be prompted “Do you want to allow the following program to make changes to this computer” click Yes (or Allow). Clicking Yes will give the Cerberus FTP Server Installer Administrator privileges to install (required on most operating systems).
The Cerberus FTP Server installer file
-
After the Welcome screen, you will see the screen where you will select your preferred service account option. The default option will create a limited privilege dedicated Windows account to run the service. See below for detailed explanations of the options.
Service configuration dialog displayed for first-time install The installer offers three options during first-time installation:
-
Standard Cerberus Account
This option creates a new, unprivileged local computer account named ‘Cerberus’ and configures the Cerberus FTP Server service to run as this user. You’ll be prompted to create a password for this account. -
Existing Local Account
For security purposes, some administrators choose to run services as specific local accounts. This option allows you to configure the service to run with these local computer accounts. -
Existing Domain Account
Likewise, Windows Domain environments may require that specific accounts be used. This account may, for instance, be granted access to the domain directory.
When username, password, or domain are required, the installer requests this information:
Installer requesting local computer username and password The ‘Validate’ button checks the username and password and alerts you if the user can’t be found or if the password is incorrect. Both Local Computer and Domain credentials can be validated, however validating domain credentials requires that the installer be run by a domain user.
For more details on the service account options, please refer to this document: Cerberus setup and installation - installing the FTP server
-
Standard Cerberus Account
- After choosing your option and validating username and password (if that's what you chose). click Next to continue.
-
On the next screen you will need to check the box to confirm your acceptance of the licensing agreement. Select the "I agree to the License terms and conditions" checkbox and click Install.
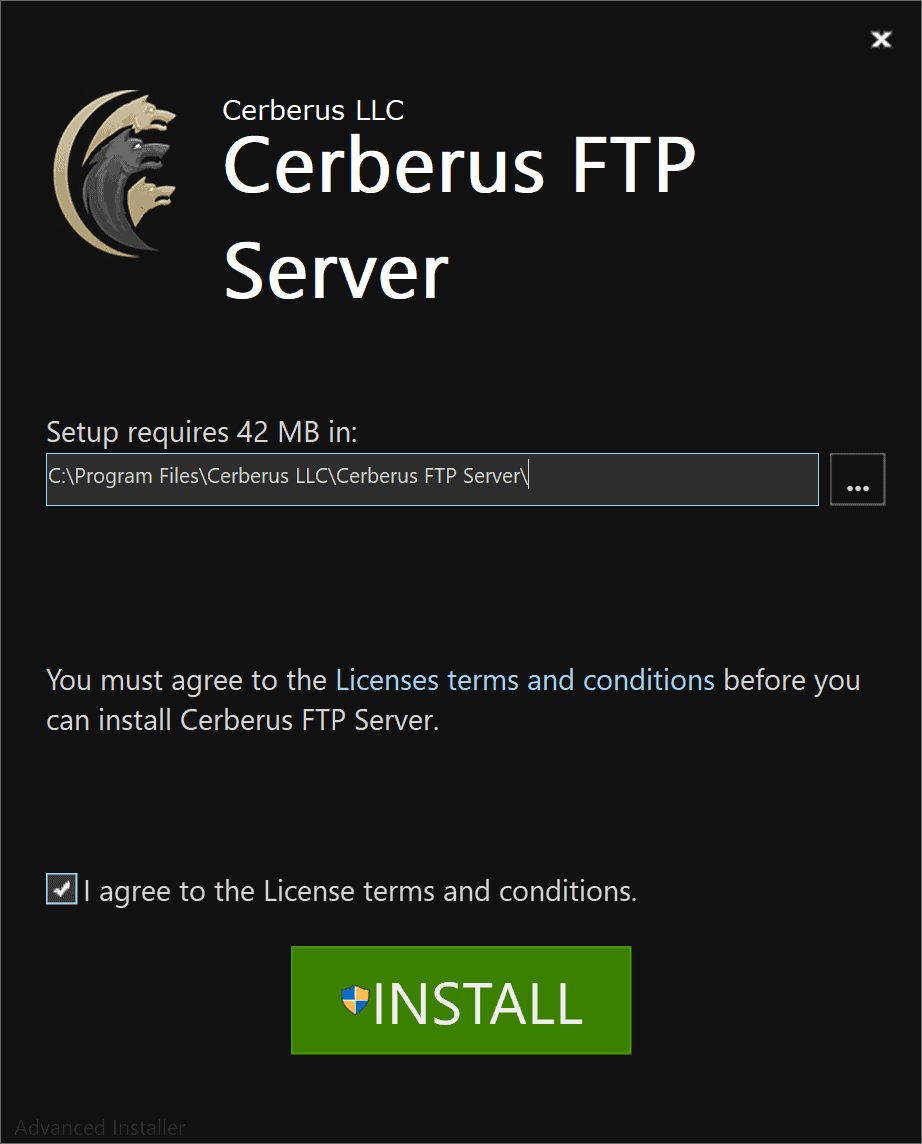
Initial Cerberus FTP Server Installer page
-
Wait for the installer to finish.
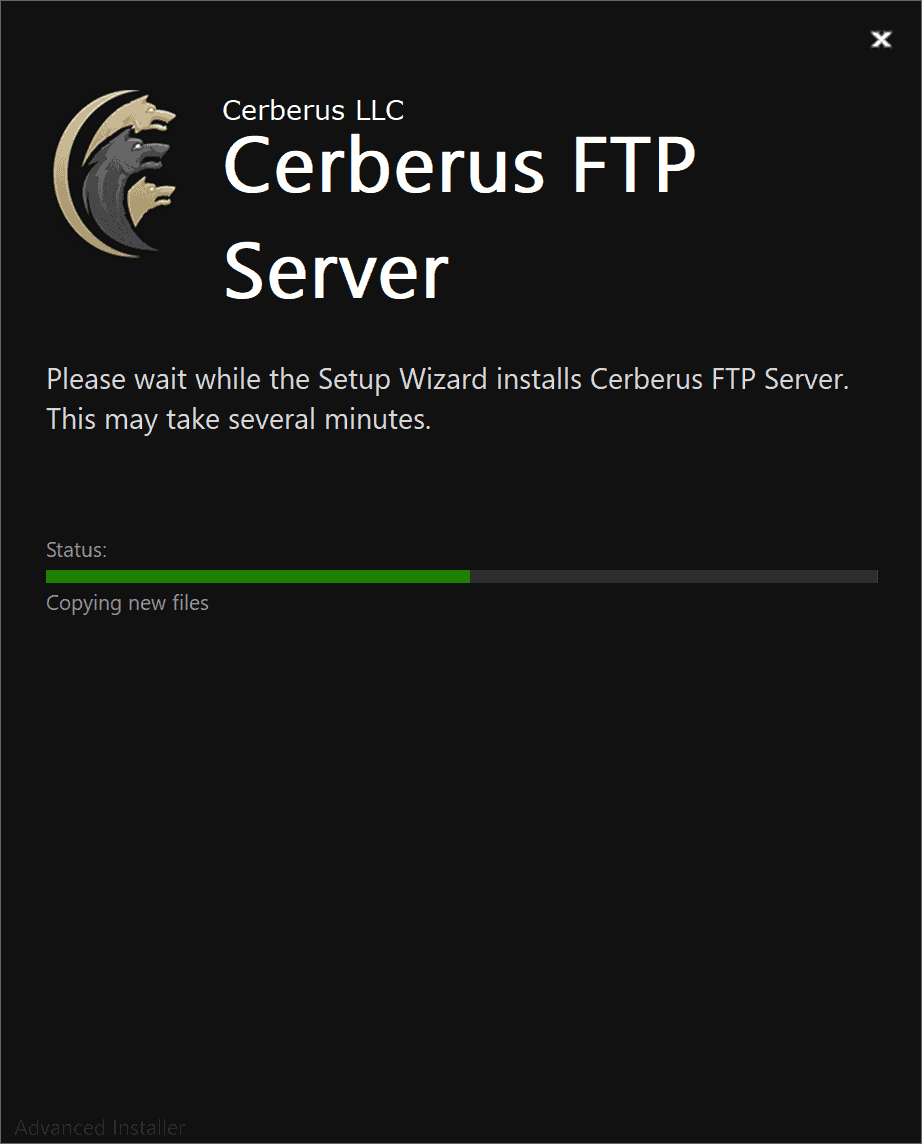
Cerberus FTP Server Installation Confirmation Page
-
Click Finish or press the Run button to launch the Cerberus FTP Server Administration Tool.
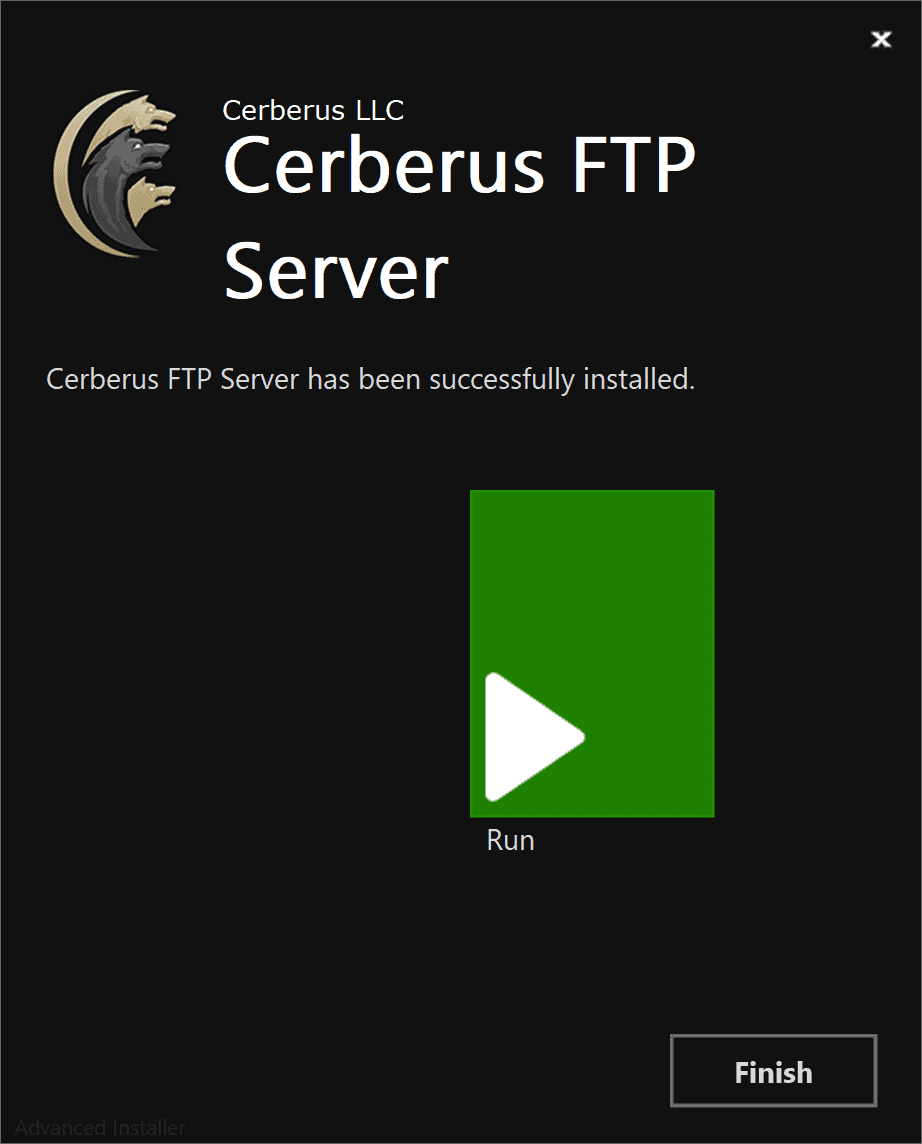
Cerberus FTP Server Installation Complete Page


Part 2: Configuring your FTP server
When you first launch Cerberus FTP Server, the Getting Started Wizard will guide you through the essential steps of configuring the server for client connections. By the end of this process, your server will be fully equipped to accept connections from a range of clients, including FTP, FTPS, SSH SFTP, and HTTP/S.
Step 1 – Network Setup
Public IP Auto-detection for Passive Mode FTP
Configuring basic FTP access to your server can be complex, especially when it comes to preparing the machine to accept FTP data connections. Unlike SSH SFTP or HTTP/S protocols, FTP requires two connections for each client session, making it more complicated. The first connection is used to exchange commands and status between the FTP server and the client, while the second connection is created every time a directory listing or file transfer takes place. To establish the secondary data connection, the FTP server has to respond with an IP address and port that the client can connect over. To simplify this process, the server automatically detects the IP address of the server on the Internet and uses it when sending the client connection instructions.
Network Setup
Upon launching Setup wizard, it opens to the Network tab and public IP auto detection immediately starts. The Network Setup page detects basic network settings and tries to provide advice on any changes that may need to be made because of the computer’s network configuration.
The Network Setup page detects basic network settings and tries to provide advice on any changes that may need to be made because of the computer’s network configuration.
Network Setup
Step 2 – Security
The Security page of the Getting Started Wizard helps the administrator configure a few basic server security settings.
Cerberus FTP Server fully supports TLSv1.2/v1.3 encryption over FTP (FTPS), HTTPS, and SSH SFTP. To enable FTPS, HTTPS, and SSH SFTP support, a digital certificate must be generated for the server. This digital certificate contains the necessary security data to allow the server to establish encrypted connections with clients.
Cerberus FTP Server automatically generates a new, self-signed certificate for you the first time you run the Getting Started Wizard, and displays common details. You can replace the certificate at any time through the Security page of the Server Manager.
Security and access settings
Web Administration Password
The Security Wizard page allows you to set up a single password that can be used for both web administration and remote API access.t is recommended to set a strong password, regardless of whether or not you use web administration.
Step 3 – Initial User Creation
The User Creation page will allow you to automatically create a simple user account with access to a directory on the local machine. You can use this account to test out your initial connection to the server. You can turn off the creation of the user account by unchecking the “Create Initial User?” checkbox.
By default, ‘inituser’ user will be created under the User Manager. The default ‘inituser’ user will have download and upload-only access to the “C:\ftproot\inituser” directory as their root drive. This directory will be created if it does not already exist. Please note, the default settings for the ‘inituser’ user allow anyone to connect to your FTP server with the provided password. To create your own user account, you may choose a different user name, and their default directory will be created as “C:\ftproot\differentUserName. If you’d rather customize a new user in full rather than the default settings, uncheck the “Create Initial user” box and the ‘inituser’ user will not be added.
You can further customize the newly added user, or create and manage additional users, by navigating to ‘User Manager’ > ‘Users’ after the “Getting Started” wizard has finished.
Step 4 – Initial Share
The "Share" tab within the Cerberus FTP Server Getting Started Wizard enables administrators to create a shareable folder during initial server setup. This folder allows others to upload and download files, and is part of Cerberus FTP Server's Public Share feature, which streamlines file sharing with clients, partners, or the public
The wizard generates a folder named "init_share" within the user directory (created under the "user" tab) and a unique, time-limited public link. This link can be opened in the webclient to upload or download files to the shared folder. For instance, if the initial user "inituser" has the directory "C:\ftproot\inituser", the shared folder's path would be "C:\ftproot\inituser\init_share".
The default expiry time for file shares is 30 days. This can be changed in the share settings via the webclient using user credentials.
The webclient has a wizard to manage public shares, including file and folder sharing and other add-on features.
To use share functionality, create an initial user in the setup wizard. The "Create Public Share" checkbox will be checked by default in the share tab.
After clicking "Setup Server" in the setup wizard, a message will show that the initial user has been created, along with the share link for the initial share folder.
The share folder can be accessed by copying the share URL shown below into a browser and entering the generated password.
Note: The Public Share feature is exclusively available for Enterprise, Enterprise Plus, and Trial license holders. Consequently, the share tab within the setup wizard will only be accessible to these license holders. It will not be available for other license holders, such as professional license holders.
Final Steps
To finalize the setup process, simply click the 'Setup Server' button on the Getting Started Wizard. Your server is now equipped to receive local network connections from FTP/S, SSH SFTP, or HTTP/S. However, to allow external access to your server from outside your local network, please refer to the next section for any necessary adjustments to your firewall or router.
Part 3: Make your FTP server accessible from the Internet
If you want users outside of your local network to access your FTP server, you may need to configure your router or firewall. Communication with an FTP server requires two connections - a control connection and a data connection. The most important areas to focus on is ensuring that these connections can be established.
Private addresses begin with 192.168, 10.0, or 172.16 and are only used for local LAN traffic. Users outside of your local network can only see your router's IP address. To enable external users to connect to your server, you need to configure your router to forward FTP traffic to the machine running Cerberus FTP Server. This is called Port Forwarding, and there are generally three steps to complete the process, depending on your router. Follow these steps to connect to Cerberus from the Internet.
- Forward the FTP and SFTP ports Cerberus FTP Server is listening on from the router to the machine running Cerberus (the default ports are 21 and 22). If you are using HTTPS then you will also need to forward port 443.
-
Forward the passive ports range from the router to the machine Cerberus FTP Server is listening on. The range is configurable and can be found on the Protocols tab of the Server Manager. The Protocols page is show below. From here you can select the ports that Cerberus will use for passive FTP connections. The range displayed below is Cerberus FTP Server’s default port range of 11000 to 13000. This is just a suggested default and the administrator can change the range to anything desired. However, a large range is recommended (at least several hundred ports) as a new port is used for each directory listing or file transfer FTP command received from a client and ports cannot be reused for several minutes because of restrictions inherent in the TCP protocol.
Selecting the PASV port rangeBelow is an example of port forwarding in a popular router. The same passive ports specified in the Advanced tab of the server manager need to be specified here.
Port Forwarding example on a routerThe above router is configured to forward requests on port 21 (for FTP), port 990 (for FTPS), port 22 (for SSH SFTP), port 443 (for HTTPS) and from ports 11000 through 13000 (PASV port range) from outside the local network (usually from the Internet for a home network) to the local machine at IP address 192.168.1.100. Any requests on those ports from the Internet will be forwarded to machine 192.168.1.100.
NOTE: Some routers inspect FTP traffic and do not allow the public IP address to be passed in the response for the PASV command. Those routers expect the internal IP address to be used. See this FAQ entry if you still have problems with FTP directory listings or file transfers after following the above steps.
-
Enable “Autodetect WAN IP at Startup” from the‘General tab of the server manager. Make sure your restart Cerberus FTP Server after enabling this option. Selecting this option will allow Cerberus to detect your public IP address and give that address out to FTP clients in response to a passive connection request. If you allowed Cerberus to detect your public IP address during the Getting Started Wizard then this option should already be checked and a restart is not necessary.
Selecting autodetect WAN IP
That’s it! Your server should now be completely configured and accessible to the outside world. The next step is opening up the User Manager and adding users and setting up virtual folder permissions.
Comments
0 comments
Please sign in to leave a comment.